
Final kit orders before 20th Jan, 2025. Store temporarily closing due to relocating.
Deluxe Making Prosthetics Kit


Deluxe Making Prosthetics Kit
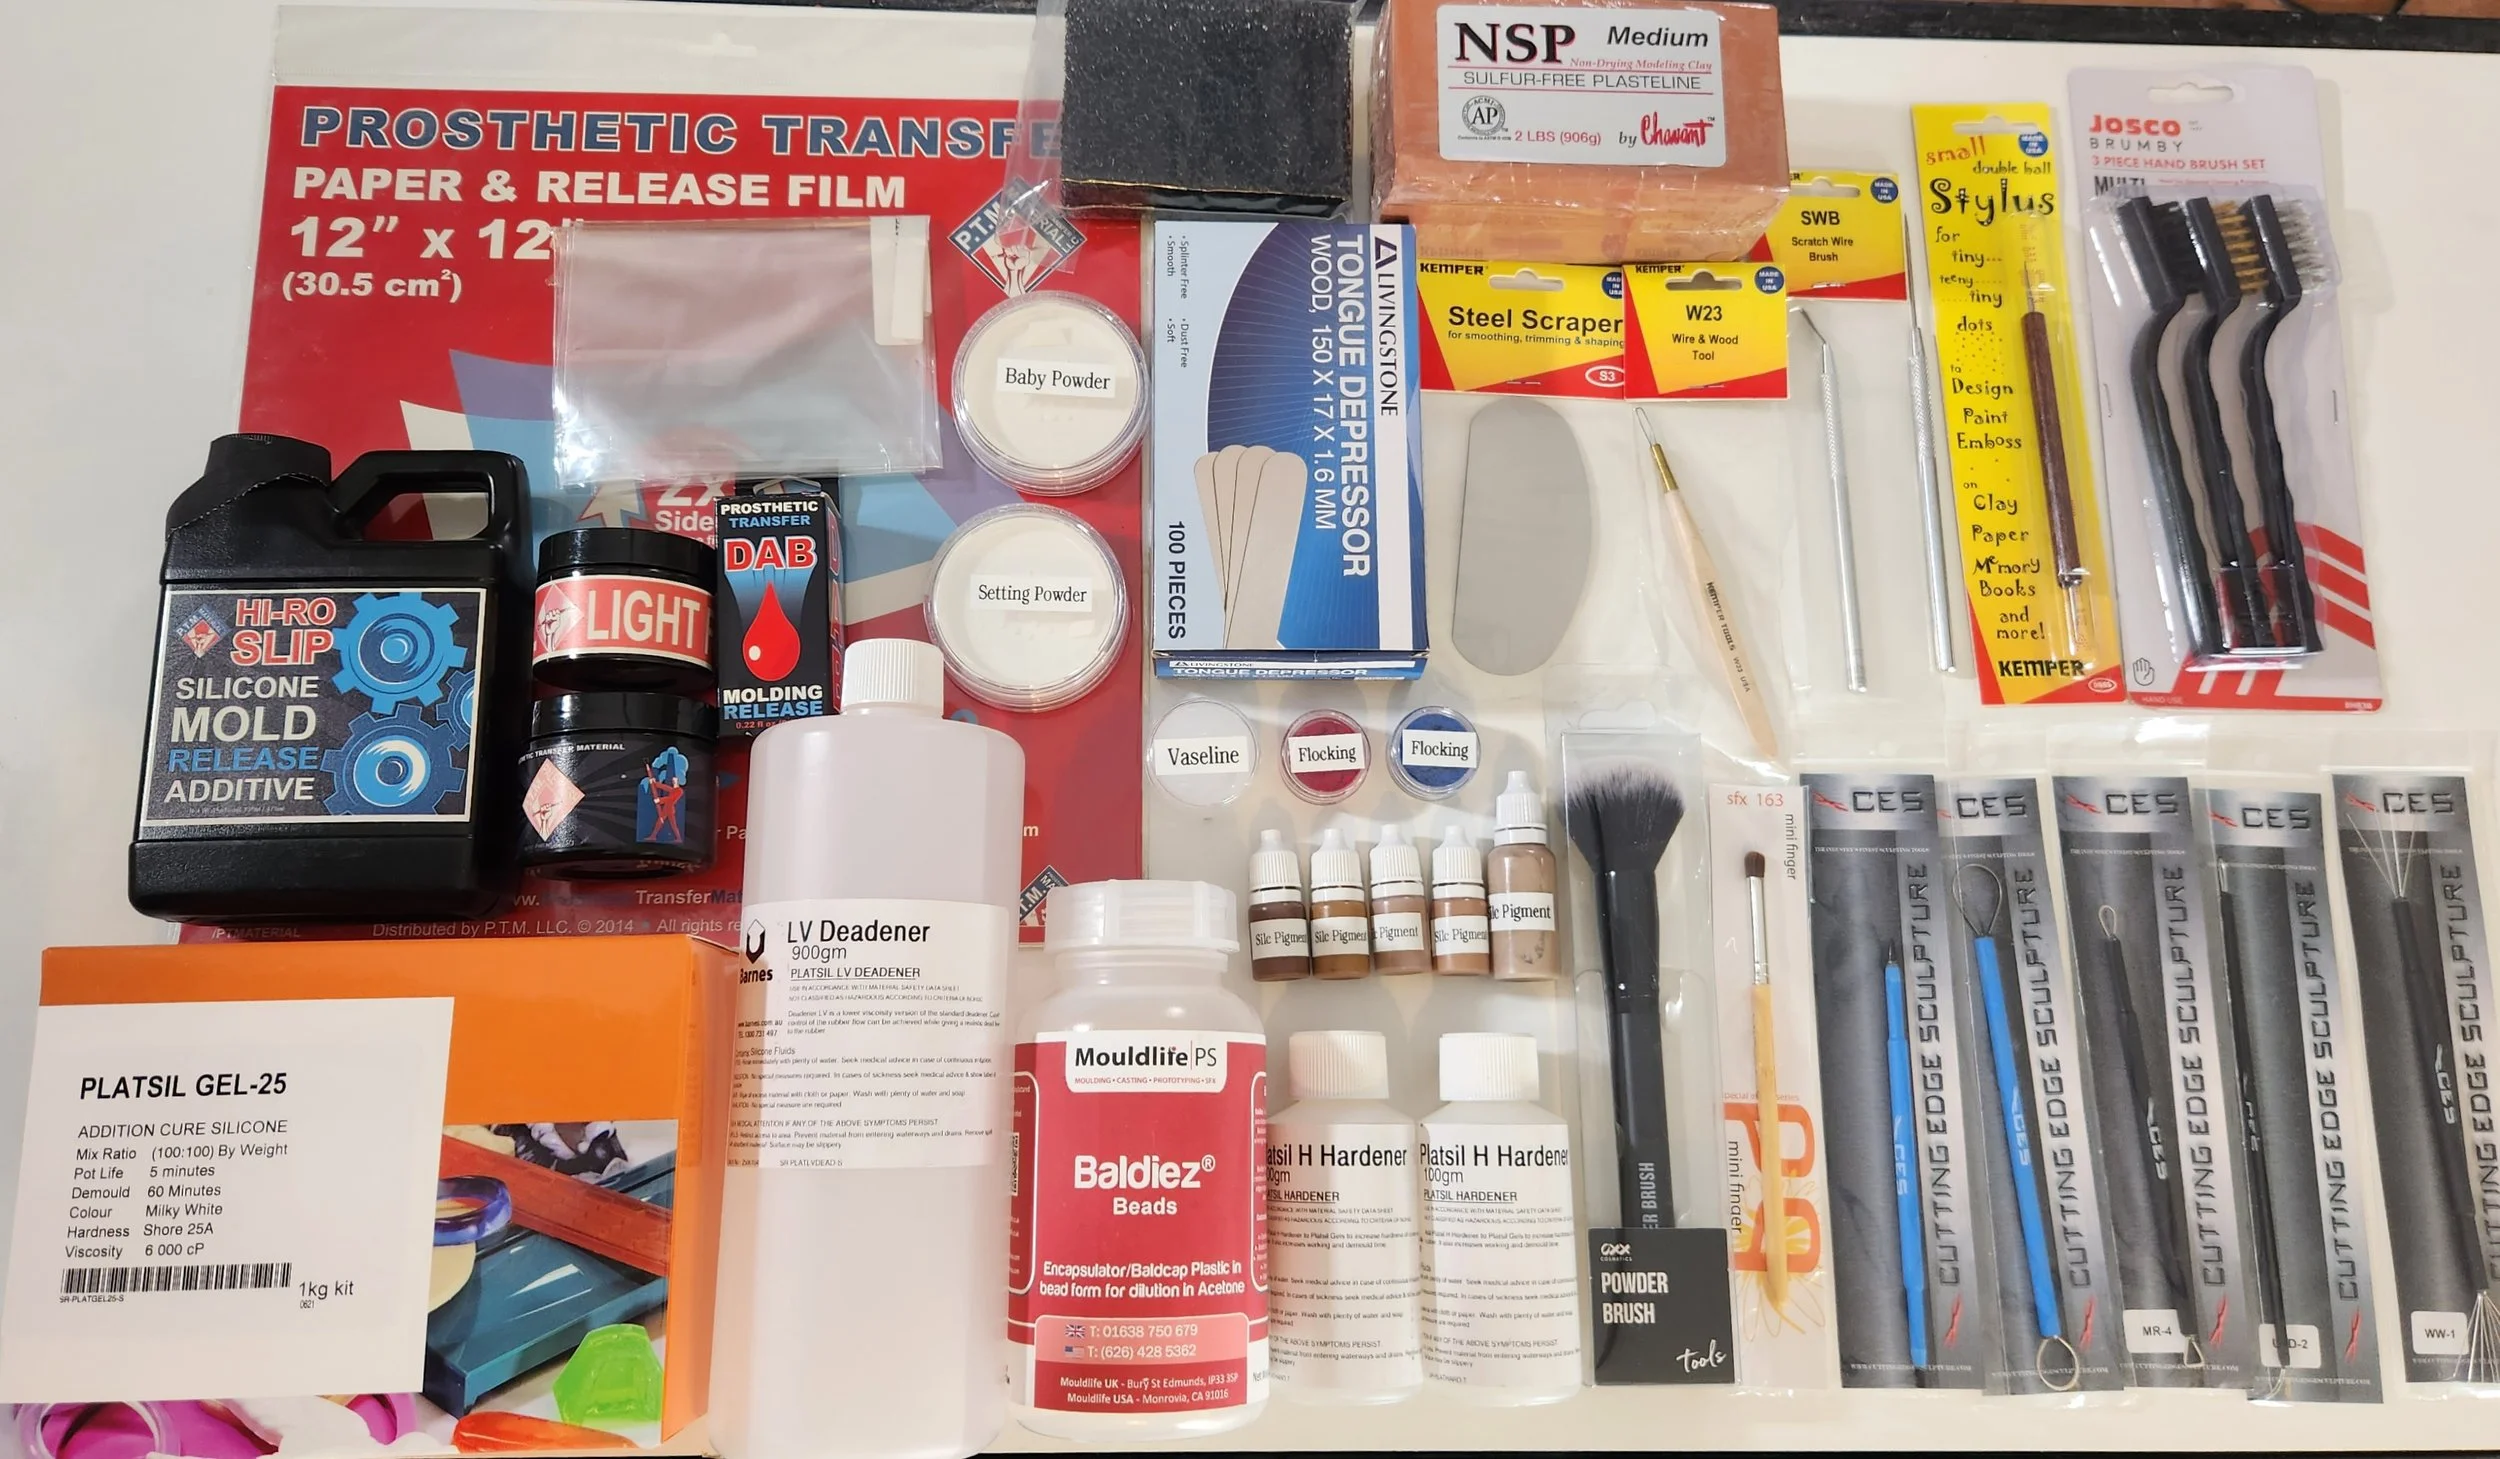
If you’re ready to up your skill level and make professional quality fx makeup prosthetics, this kit has (nearly) everything you need to make your own silicone prosthetics and prosaide transfers.
The kit includes clay, sculpting tools, texturizing sponges, baby powder and brushes for sculpting and texturizing your prosthetic. A small Platsil Gel 25 silicone kit, with hardener to make your flat mould, and deadener to create soft, realistic silicone prosthetics. Baldiez beads to encapsulate your silicone prosthetic, for smooth invisible edges (BYO acetone). Transfer film with Prosthetic Transfer Material paste to make your own prosaide transfers (they apply like temporary tattoos!).
Differences between kits:

Sculpting Tools:
o CES WW-1 Wrinkle Tool
o CES MR-4 Micro Rake
o CES Double Loop Rake
o CES Double Rubber Tool
o CES UFD-2 Fine Detail Loop
o Kemper Steel Scraper
o Kemper Double Ball Stylus
o Kemper Scratch Wire Brush
o Kemper Wire and Wood Tool w23
o Barnes Prick Tool
o Wire Brush Set
o Bdellium Mini Finger Brush
o Black Texture Sponge
o Powder Brush
o 1/2 inch Chip Brush
o Plastic Sheet
· NSP Medium Clay block 900g (for sculpting prosthetics)
· Flashing clay
· Cardboard strip for walls
· Baby Powder (for sculpting)
· Prosthetic Transfer Material paste, two skin tones, a 2 oz primary tone + 1oz extra tone to customize. Available in: 2oz Pale + 1oz Light, 2oz Light + 1 oz Pale, 2oz Light + 1 oz Medium, 2 oz Medium + 1 oz Light, 2oz Medium + 1oz Tan, 2oz Tan + 1oz Medium, 2oz Tan + 1oz Dark, (what you fill moulds with to make prosaide transfers)
· PTM Transfer Paper & Release Film sheets (12x12 in) (needed to make and apply prosaide transfers)
· PTM Hi Ro Slip (prosaide transfer self-releasing mould additive)
· PTM Dab (release for prosaide transfer moulds)
· Barnes Platsil Gel 25 1 kg (for making moulds and making silicone prosthetics)
· Barnes Hardener 200g (Makes mould firmer)
· Barnes Low Viscosity Deadener 900g (makes silicone prosthetics soft)
· Baldiez Beads 100g (cap plastic to encapsulate silicone prosthetics)
· Silicone Pigment: 1 large + 4 small pigments in the other tones, to cover your main skin tone, plus extras for customising tones. Available in: Pale, Light, Medium, Tan, or Dark.
· Blue and Red Flocking (for colouring silicone prosthetics)
· Setting Powder (for demoulding silicone prosthetics)
· Vaseline (for releasing silicone moulds)
· Metal Scraper (for scraping silicone moulds)
· Bdellium Tools Square Glue Brush SFX 125 (flat brush for cap plastic)
· Tongue Depressor Sticks x 100 / full box (for mixing)
· Cotton Tips
Other Items (you’ll need to source yourself, as they are flammable or heavy/large)
Tile or Melamine Board for sculpting onto
99% Isopropyl Alcohol
·Acetone
Hot Glue Gun
Vinyl gloves (non latex disposable gloves) in your size
Disposable mixing cups
(Optional) A paintable mould release spray, such as Ultra 4 Epoxy Parfilm
Steps:
For sculpting your prosthetics, grab a tile or melamine board from a hardware store to sculpt onto. From the kit grab your lump of NSP Medium Clay (the industry standard), and collection of sculpting tools from Cutting Edge Sculpture and Kemper tools to sculpt whatever your heart desires. Pro tip: always use a reference image and copy what occurs in real life reference pics. Use baby powder, textured sponges, and solvent (I recommend 99% isopropyl alcohol or shellite/naptha from a hardware store) to add textures or smooth things out. Grab a your soft plasteline clay flashing and place it a couple of millimeters around the edge of your sculpt.
For moulding your prosthetics, grab either a disposable cup with the bottom cut off, or a thick piece of cardboard to create a wall around your prosthetic, and secure it to the tile or board with a hot glue gun. Mix your Platsil Gel 25 Part A and Part B with the Hardener, at a ratio of 1A:1B:1H (eg 10 grams part A, 10 grams part B, 10 grams Hardener) and grey pigment, and thoroughly mix in a disposable cup with your tongue depressor stick. For a prosaide transfer mould you can skip the hardener - harder moulds are better for silicone, but a softer/flexible mould can be helpful for prosaide transfers. Make sure Part A and Part B do not touch until you are ready to use them, and are kept separate (as in, don’t use the same stick to get Part A out of the bottle then use that stick to get Part B out of it’s bottle, as it will have a chemical reaction and cure in the bottle and become unusable). Let cure for an hour. Remove the cardboard or cup walls, and remove from the sculpting board. Clean out any remaining clay in the silicone mould with a paper towel, cotton tips, and isopropyl alcohol.
For casting your silicone prosthetic, rub a thin layer of vaseline over your mould and let it sink in for 5 mins, then wipe off any excess with a paper towel (you just need a thin layer). Make sure your Baldiez Beads are ready to go, as in you’ve already added the acetone to them to dissolve them, and let it sit for a week or so. For brushing on the cap plastic (if you have no airbrush), grab a disposable cup and make a mixture of 1 part acetone to 1 part Baldiez. Brush a somewhat thin layer across the mould (not enough to fully pool in the deepest parts of the mould, but if the brush is too dry it can pull off previous layers of Baldiez as you build it up). Do between 2 to 4 layers, letting each layer fully dry between coats, and use the prick tool to lift up a corner to make sure it is thick enough and there are no visible holes in the cap plastic layer. If you have an airbrush to use instead of a brush, make a mixture of 5 parts acetone to 1 part Baldiez. Make sure you use a respirator while you spray (so you’re not inhaling vaporised plastic particles into your lungs), and do it in a space that has good air ventilation. Do 4 to 6 layers, allowing them to fully dry between, and use the prick tool to check thickness to know when to stop.
Next, mix up your Platsil 25 silicone and LV deadener to 170% deadener, (eg part A + part B = Y grams. Deadener = Y grams x 1.7. So 5 grams A + 5 grams B = 10. 10 x 1.7 = 17 grams of deadener. 5 A + 5 B + 17 D = 27 grams silicone mix total.) Mix in a drop or two of your silicone skin tone pigment. Use a black sharpie to mark a dot on the end of your tongue depressor stick, and dip it into your silicone mixture to test the pigment opacity and see if you need to add more. You want to only sort of be able to see the black dot as the mixture drips off (similar to how much you can see a vein under the skin). If it’s so opaque the dot isn’t visible, then it’s too much pigment. If the black dot is super visible then it’s not enough pigment, add more. Pour the silicone mixture into your mould, and use a metal scraper to gently scrape off the excess. You will want to see no silicone on raised area between your sculpt and the flashing area. Use cotton tips to gently go over that edge in front of the flashing, to make sure there is no thin silicone remnants there, as they will prevent the cap plastic edge from melting down with acetone. Try not to touch the sculpt area with your cotton tips. Let the silicone cure for 30 mins, then do another layer or two of cap plastic layer on the back. Leave overnight for the cap plastic to fully cure.
Demould your piece using transparent setting powder (important - without this the cap plastic can stick to itself and rip), cut off any cap plastic around the flashing edge, and pin through the flashing onto a foam core board for storage.
For running your prosaide transfer, the sculpting and moulding steps are the same. Cut your clear release film to the same size as your mould. Release your mould with a couple of drops of DAB on a brush. Using a tongue depressor, smooth in your Prosthetic Transfer Material Paste into the mould, overfilling a little. You need to overfill so you can scrape the excess out without trapping air bubbles. Put the plastic release film on top of the PTM paste, and using either a tongue depressor or a looped sculpting tool, gently scrape from side to side, to squeeze the excess PTM into the flashing area, to make the edges nice and flat and free of product. Place the mould into the freezer for 1 to 2 hours. Remove from freezer, and with the plastic side down and the mould on top, peel the mould off the release paper. The frozen PTM should be on the release film and not in the mould. Leave the prosaide transfer on the clear sheet to dehydrate, sometimes this takes 2 days, sometimes it takes up to a month, depending on how thick the piece is and how warm your climate is. You can use a food dehydrator set to 30 degrees to speed up the dehydration process. Once the prosthetic is fully dehydrated, it will all be one semi translucent colour and no longer have any opaque white spots. Use the transfer paper for application.
Products and tools for prosthetic application aren’t included in this kit, but if you don’t already have those things, I have an Applying Prosthetics Kit available as well.


